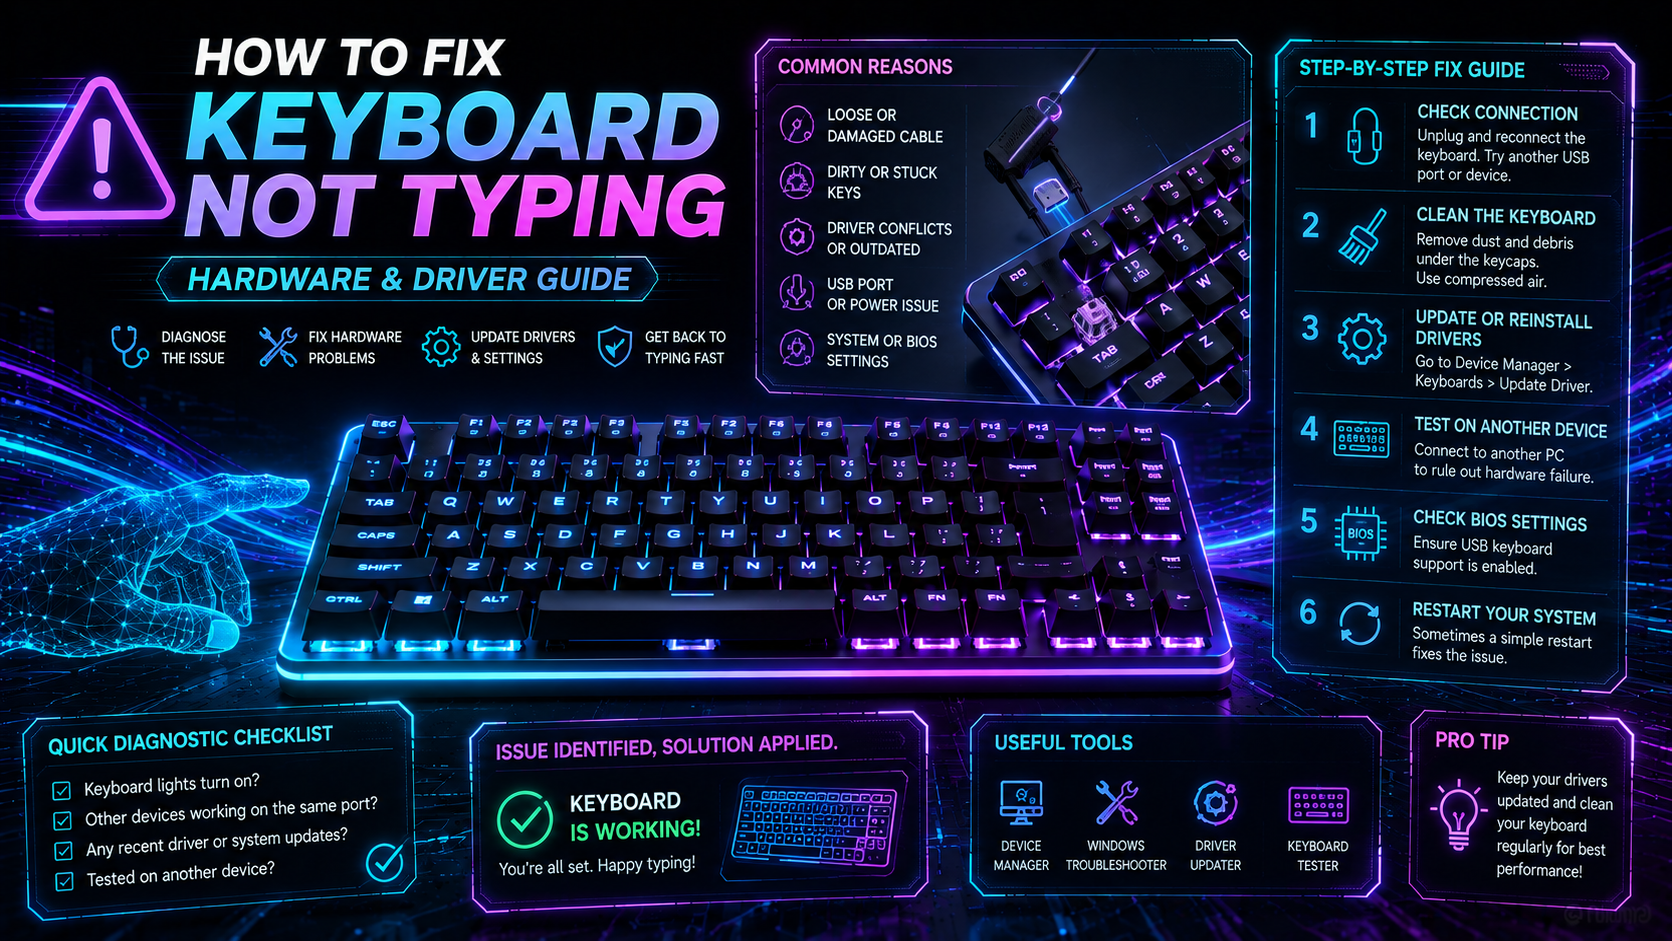
A non-responsive keyboard halts digital workflows instantly. When troubleshooting how to fix keyboard not typing, engineers approach the breakdown through structured signal-chain isolation. Keystroke failures originate from software drivers, physical connectivity, firmware corruption, or individual key switch degradation. Most keyboard lockups stem from simple driver freezes or accessibility settings. Complex failures, on the other hand, involve damaged printed circuit board (PCB) traces or bent switch pins. Systematic diagnosis restores input functionality quickly.
Isolation saves troubleshooting time. Begin by testing the keyboard on a secondary computer. If the keyboard functions on another machine, the problem resides inside your primary operating system driver stack. If the hardware remains unresponsive everywhere, you face a physical cable, microcontroller, or switch failure. Following a bottom-up diagnostic protocol eliminates guesswork.
Diagnostic Matrix: Identify Your Specific Keyboard Failure
Keyboards fail in distinct patterns. Identifying the specific symptom pinpoints the root cause immediately.
💡 Pro Tip: Run our free Online Keyboard Tester to verify if specific keys register scan codes or if entire matrix columns have dropped offline.
| Failure Pattern Probable Root Cause Primary Diagnostic Step Permanent Resolution Method | |||
| Entire keyboard completely dead (no LEDs) | USB port power failure or severed cable | Switch USB ports or swap detachable cable | Replace cable or connect to powered USB hub |
| LEDs illuminated but no characters register | OS driver freeze or Filter Keys lockup | Check OS accessibility toggles | Reinstall HID keyboard drivers in Device Manager |
| Single key fails to register input | Faulty switch contacts or bent hot-swap pin | Inspect physical switch housing | Swap switch or straighten bent socket pins |
| Entire row or column fails simultaneously | Cracked PCB trace or blown matrix diode | Inspect PCB under magnification | Bridge broken trace with insulated jumper wire |
| Keys type repeatedly or produce gibberish | Contact chatter or corrupted QMK firmware | Test switch debounce latency | Reflash default firmware or increase debounce ms |
| Laptop built-in keyboard unresponsive | Loose ribbon cable or embedded controller lockup | Check BIOS key recognition | Reseat internal flex ribbon cable to motherboard |
Diagnostic testing prevents unnecessary replacements. Many users discard functional keyboards when a simple software toggle caused the freeze. Always verify hardware state before attempting physical repairs.
Physical repairs carry component risks. Pulling hot-swap switches with excessive lateral force can tear copper socket pads off the PCB. Gentle, vertical extraction prevents permanent circuit damage.
Software and Driver Protocols: How to Fix Keyboard Not Typing on Windows, Mac, and Linux
Operating system driver conflicts cause over half of sudden keyboard lockups. When Windows, macOS, or Linux updates corrupt the Human Interface Device (HID) driver stack, keydown events fail to pass to user space. Follow these operating-system-specific steps to rebuild your input pipeline.
1. Disable Windows Filter Keys Accessibility Trap
Windows includes an accessibility feature called Filter Keys. Holding down the right Shift key for eight seconds accidentally activates this mode. When enabled, Windows ignores brief keystrokes entirely. Open Settings > Accessibility > Keyboard and ensure Filter Keys and Sticky Keys are completely switched off.
2. Reinstall HID Keyboard Drivers in Device Manager
Corrupted driver state prevents Windows from parsing standard USB HID packets. Resetting the driver stack resolves background conflicts:
- Right-click the Start button and select Device Manager.
- Expand the Keyboards category.
- Right-click every entry labeled HID Keyboard Device or Standard PS/2 Keyboard and choose Uninstall device.
- Unplug the USB keyboard cable.
- Restart your PC using your mouse.
- Reconnect the keyboard into a direct motherboard USB port to trigger a clean driver initialization.
3. Reset macOS USB and Bluetooth Controller Daemons
On macOS, background input daemons can freeze during sleep transitions. Open Terminal and run the command sudo pkill -9 WindowServer to restart the core graphical and input server. For Bluetooth keyboards, turn Bluetooth off in System Settings, wait ten seconds, and re-pair the peripheral. If internal MacBook keyboards freeze, reset the System Management Controller (SMC) to recalibrate low-level power delivery to the top case.
4. Diagnose Linux Kernel Input Streams
Linux distributions handle keyboard signals through the evdev and libinput subsystems. Open terminal and run dmesg | grep -i usb to check if the kernel enumerates the keyboard hardware. Run xev or evtest to monitor raw keypress event codes in real time. If the kernel recognizes the device but desktop environments fail to register characters, reconfigure the X11 keyboard map using setxkbmap us.
Hardware and Cable Debugging: Removing Physical Bottlenecks
If software resets fail, inspect the physical connection path. Signal degradation across cheap USB cables or unpowered hubs frequently starves keyboard microcontrollers of necessary operating voltage.
"Keyboards require stable 5V power; unpowered USB hubs sharing bandwidth with external drives often drop keyboard packets."
Follow these physical hardware checks:
- Bypass External USB Hubs: Connect your keyboard directly to rear motherboard I/O ports rather than front case panels or unpowered splitters.
- Test Detachable Type-C Cables: Inspect USB-C connectors for bent pins or debris. Swap in a verified data-capable cable, as charge-only cables fail to establish data handshakes.
- Inspect 2.4 GHz RF Dongle Line of Sight: Wireless 2.4 GHz dongles suffer heavy packet drops when placed near USB 3.0 external drives or Wi-Fi routers. Use an extension cable to position the dongle within twelve inches of the keyboard.
- Inspect Internal Laptop Ribbon Connectors: If a laptop keyboard drops offline after an impact, remove the bottom chassis and verify the flat flex cable sits squarely inside its zero-insertion-force (ZIF) socket.
Wireless setups introduce battery constraints. Low lithium-ion battery voltage drops wireless transmit power, creating intermittent keystroke loss before the device dies completely. Charge wireless keyboards fully before diagnosing deeper hardware faults.
Mechanical Keyboard Repairs: How to Fix Keyboard Not Typing on Specific Keys
Mechanical keyboards offer modular repair advantages. If a single key fails while surrounding keys function normally, the fault lies within that specific switch assembly or hot-swap socket.
1. Hot-Swap Switch Extraction and Pin Inspection
Use a metal switch puller to compress the top and bottom housing tabs. Pull straight upward vertically. Inspect the two copper pins beneath the switch stem. Bent pins fail to seat into the PCB socket, causing dead keypresses. Straighten bent pins using tweezers before reseating the switch firmly.
2. Cleaning Oxidized Metal Leaf Contacts
Dust and spilled liquids cause electrical contact oxidation. Apply two drops of 99 percent isopropyl alcohol directly into the switch stem while depressing the keycap. Tap the switch twenty times rapidly to dislodge oxidation. Allow twenty minutes for the alcohol to evaporate completely before reconnecting power.
3. Diagnosing PCB Matrix Diode Failures
Keyboard circuits route keys in a multiplexed matrix of intersecting rows and columns. Each key position contains a small 1N4148 switching diode to prevent ghosting. If a single diode burns out, the corresponding switch stops registering entirely while adjacent keys remain functional. Use a digital multimeter in continuity mode to probe the diode terminals. Solder a replacement SMD diode across the pads to restore connectivity.
4. Reflashing Corrupted QMK or VIA Custom Firmware
Custom mechanical keyboards using RP2040 or ATmega32U4 microcontrollers can suffer EEPROM corruption. Put the board into bootloader mode by holding Escape while plugging in the USB cable. Launch QMK Toolbox or use VIA Configurator to flash default factory firmware.
Firmware flashing requires caution. Uploading incorrect hex files can soft-brick keyboard controllers, requiring manual hardware pin bridging on the PCB to restore bootloader access.
Testing and Verifying Input Performance
Once you resolve the physical or software fault, verify full matrix functionality. Launch our free Online Keyboard Tester to confirm that all modifier keys, function rows, and numeric pads register clean down-up events without ghosting.
After confirming hardware health, benchmark your recovered typing speed on the TypingPulse Speed Test. Test for key bounce and rhythm consistency. If you want to rebuild typing fluidity after a long hardware interruption, practice structured exercises in our Interactive Typing Practice arena or explore foundational lessons inside Typing Academy Lessons.
Summary: Permanent Fixes for Unresponsive Keyboards
Understanding how to fix keyboard not typing depends on systematic signal-chain isolation. Eliminate software driver corruptions and accessibility traps first. Next, test physical USB power stability and cable integrity. Finally, inspect mechanical switch pins, PCB solder traces, and matrix diodes for component faults. Methodical troubleshooting restores reliable typing performance without costly hardware replacements.
Frequently Asked Questions
Key answers regarding touch typing, benchmarks, and techniques
TypingPulse
Typing & Tech Specialist
Written by typing trainers and keyboard specialists dedicated to helping students and developers achieve touch typing mastery, ergonomic comfort, and competitive WPM speeds.